> For the complete documentation index, see [llms.txt](https://docs.nected.ai/nected-docs/llms.txt). Markdown versions of documentation pages are available by appending `.md` to page URLs; this page is available as [Markdown](https://docs.nected.ai/nected-docs/references/attribute-library/dynamic-lookup-table.md).
# Dynamic Lookup Table
Dynamic lookup tables (also called **Attribute Library lookup tables**) let you maintain a curated list of allowed values once and reuse it across **Rules**, **Decision Tables**, and **Workflows**. Instead of copying lists everywhere, you centralise them in the Attribute Library and reference them wherever needed.
This guide covers:
* how to create and edit lookup tables in the UI
* when to use the UI vs API vs workflows
* how to keep values in sync (real-time or scheduled)
#### When should you use a Dynamic Lookup Table?
Dynamic lookup tables are useful when you want:
* **Standardised statuses/codes**: e.g., `Approved`, `Pending`, `Rejected`
* **Long lists managed centrally**: SKUs, partner names, region codes, tiers, etc.
* **Consistency across many rules/workflows**: eliminate drift and typos
* **Controlled updates**: business users can edit safely via UI, while engineers can automate changes via API/workflows
#### Choose the right update method (UI vs API vs Workflow)
Use this decision guide before you start:
* **UI (manual edits)**: best for small lists and quick one-off changes.
* **API (bulk update / migration)**: best when inserting/updating hundreds or thousands of values programmatically. See [Dynamic Lookup Table API (Attribute Library)](/nected-docs/management-api/dynamic-lookup-table-api-attribute-library.md)
* **Workflow (ongoing sync)**: best when values must remain in sync with an external system of record (database/CRM/spreadsheets/etc.).
* **Real-time**: source pushes updates (Webhook-triggered workflow).
* **Scheduled**: run the sync workflow periodically (Scheduler → schedule a rule that triggers the workflow).
***
### Create and manage lookup tables in the UI
In the left navigation, open **Attribute Library** to reach the **Attribute Groups** page. A **group** contains one or more **attributes** (each attribute is a lookup table).
#### 1) Create an attribute group
1. Navigate to **Attribute Library**.
2. Click **Create Groups**.
3. Enter a **Group Name** (e.g., `OrderStatuses`) and an optional description, then save.
#### 2) Add an attribute (lookup table) and values
1. Open a group by clicking its name.
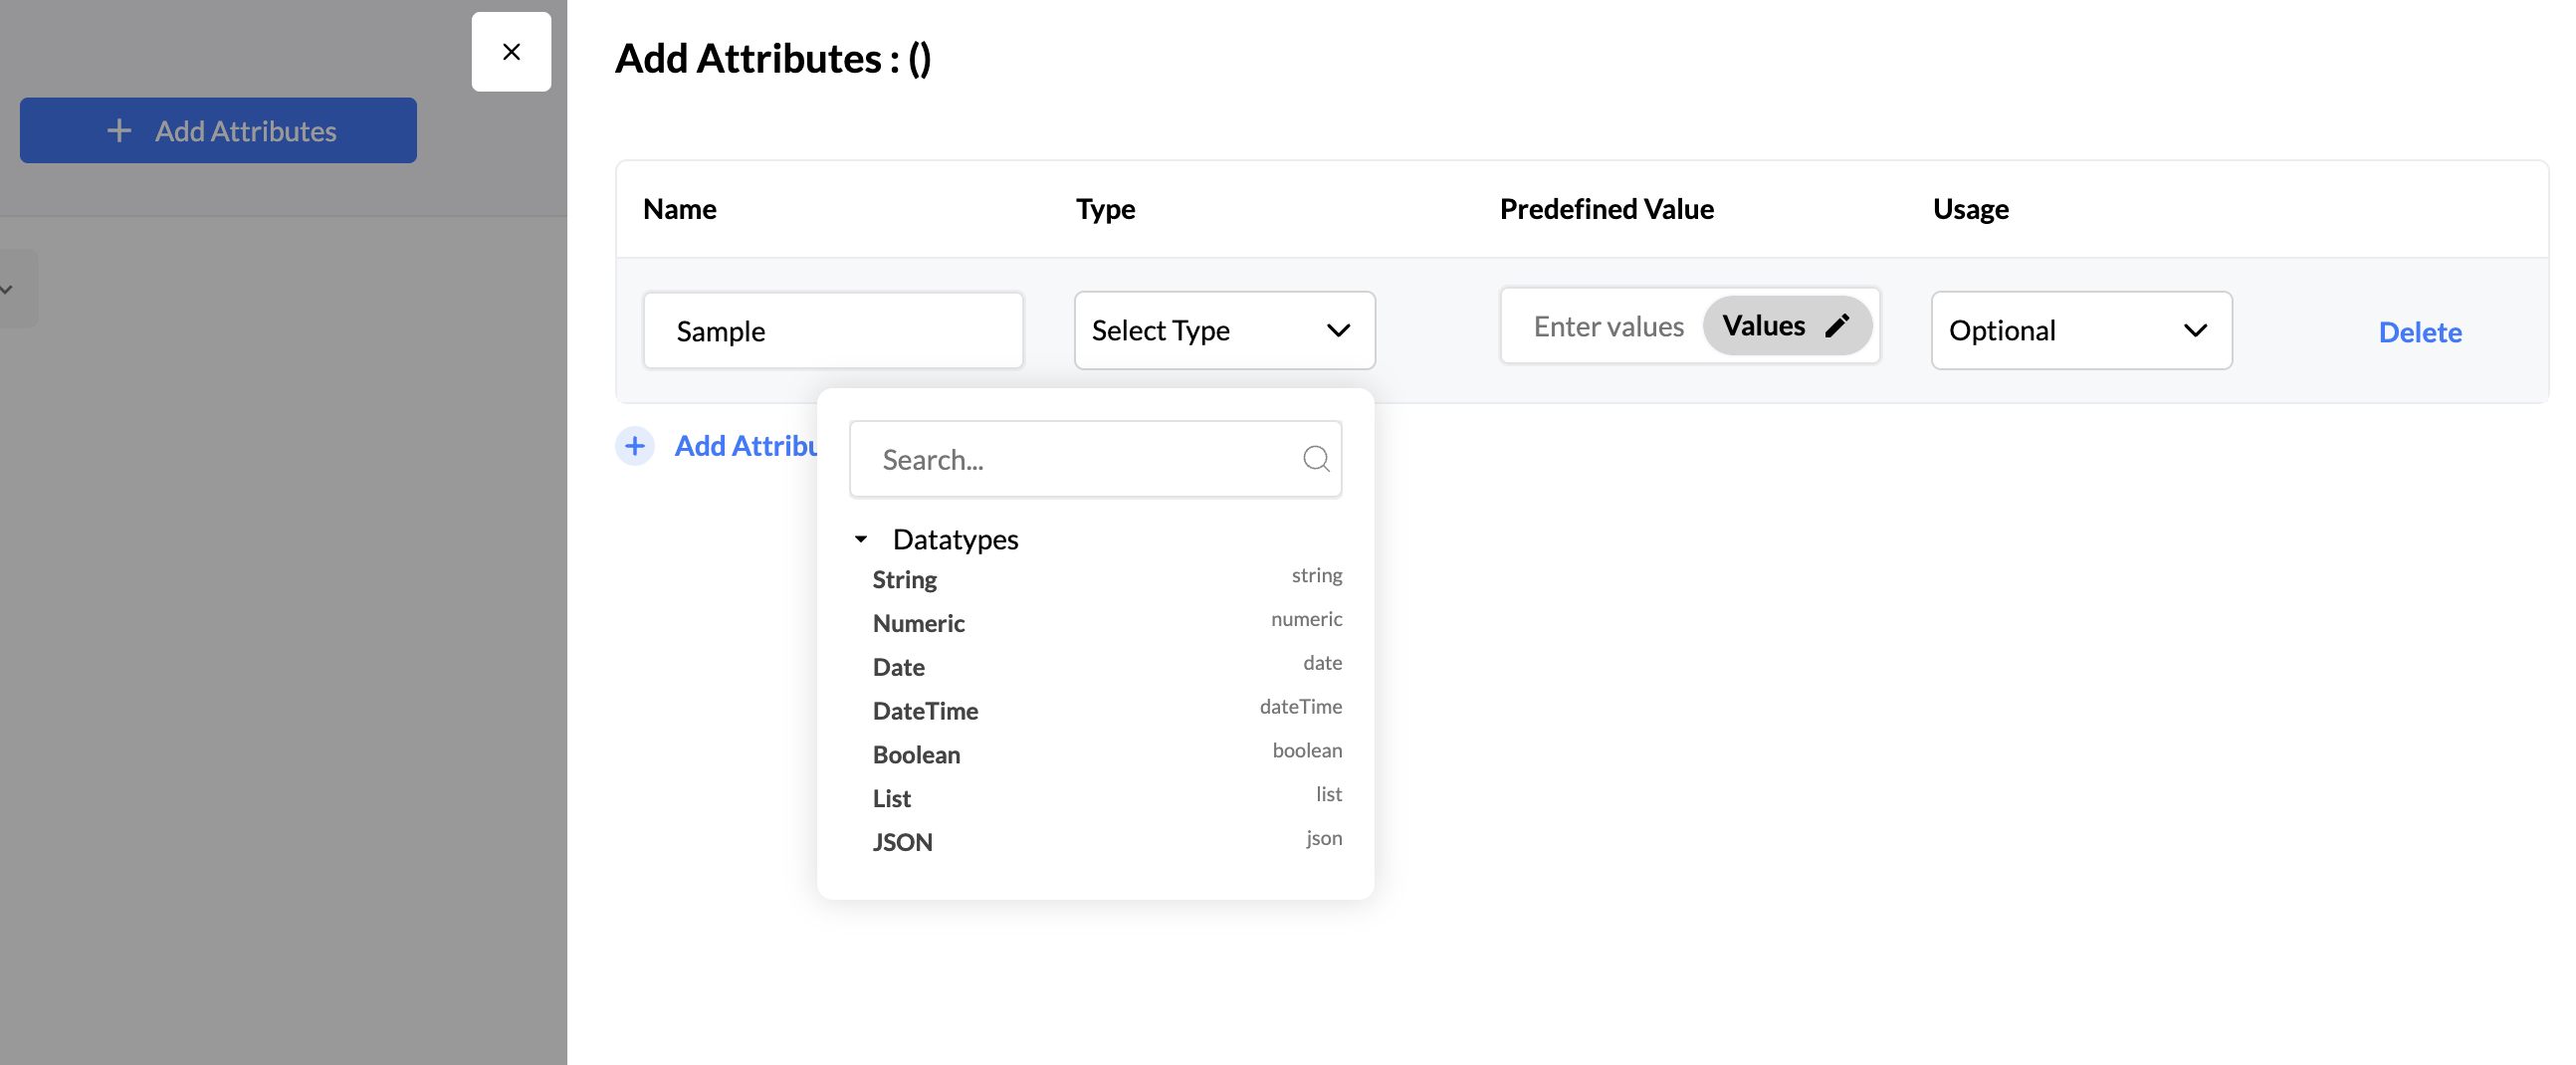
2. Click **Add Attributes** to open the editor panel.
3. Click **Add Attribute**. Configure:
* **Name**: identifier for the lookup table (e.g., `StatusCode`)
* **Type**: `String`, `Numeric`, `Date`, `DateTime`, `Boolean`, `List`, `JSON`
* **Predefined Value**: click **Values** to open the **List Editor**
* **Code**: paste a JSON array
* **No Code**: add/edit items in a form UI
* **Usage**: `Mandatory` or `Optional`
4. Click **Save**.
#### 3) Edit an existing lookup table
1. Open the group.
2. Click the attribute name to open its side panel.
3. Use **Values** to edit the list.
4. Click **Save**.
#### When the UI is enough
Use the UI when you’re adding a few new values, fixing typos, or making a quick correction. If you find yourself repeating changes across environments or updating large lists, switch to API/workflows.
***
### Bulk updates via API (best for migrations)
Use the API when you need scripted updates, environment promotions via CI/CD, or large value lists.
* **Docs**: `[Dynamic-Lookup-Table.md](/Volumes/Samsung_T5/nected/Docs/API/Attribute%20Library/Lookup/Dynamic-Lookup-Table.md)`
***
### Keep lookup tables in sync via workflows (ongoing automation)
If your lookup values must stay aligned with another system, build a **workflow** that fetches values, transforms them into a clean list, and updates the Attribute Library.
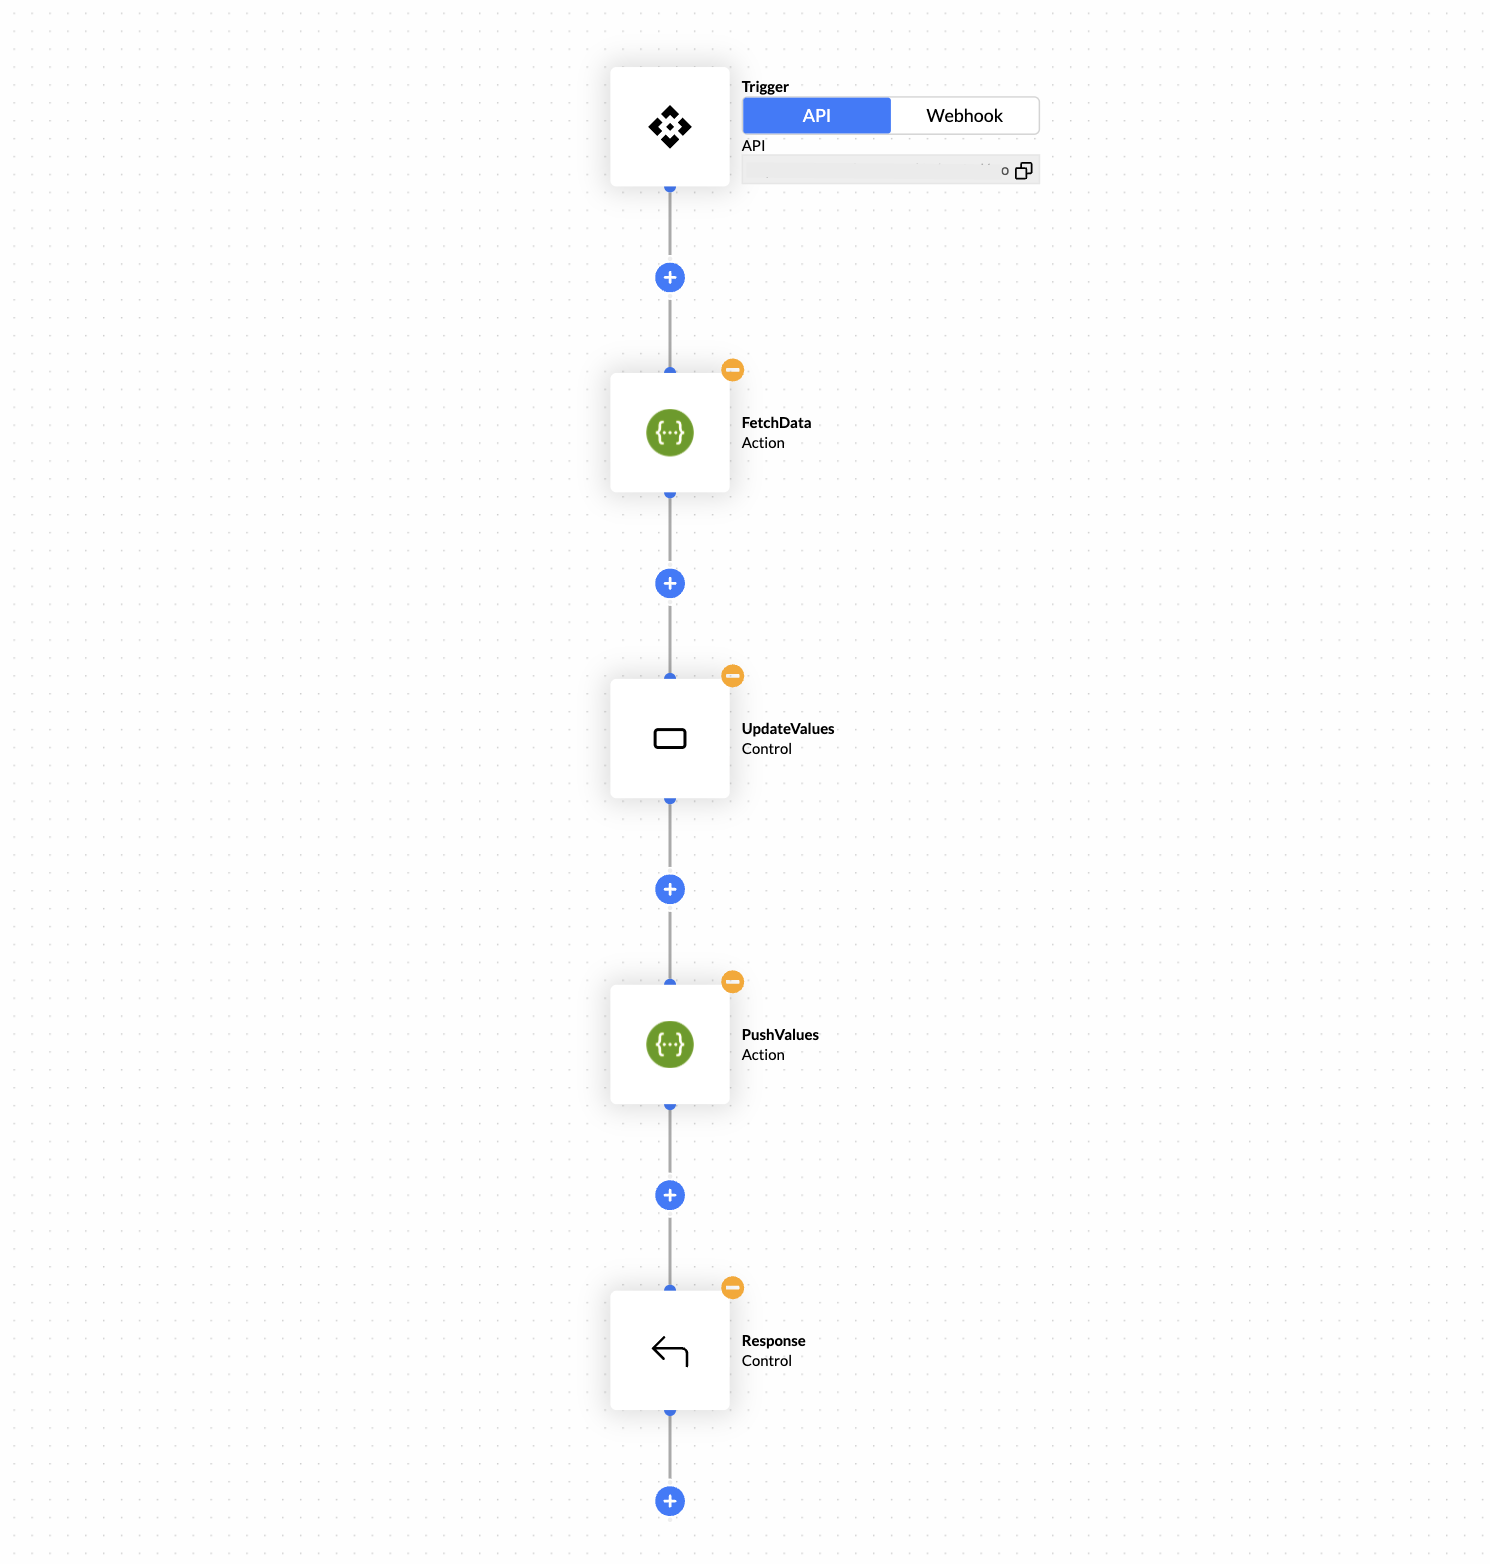
#### Typical sync workflow shape
1. **Trigger**
* Use **Webhook** when the source system can push updates in real time.
* Use **API** when you want to call the workflow on demand (including from a scheduled rule).
2. **Fetch data** from your source (DB query / API / spreadsheet connector).
3. **Transform values** using **SetVariable** (extract the field you need, normalise, de-duplicate).
4. **Update attribute** using an **API/HTTP** node calling the Attribute Library update endpoint.
5. **Response** node to return `syncStatus`, counts, and any error details.
#### Create the workflow (UI steps)
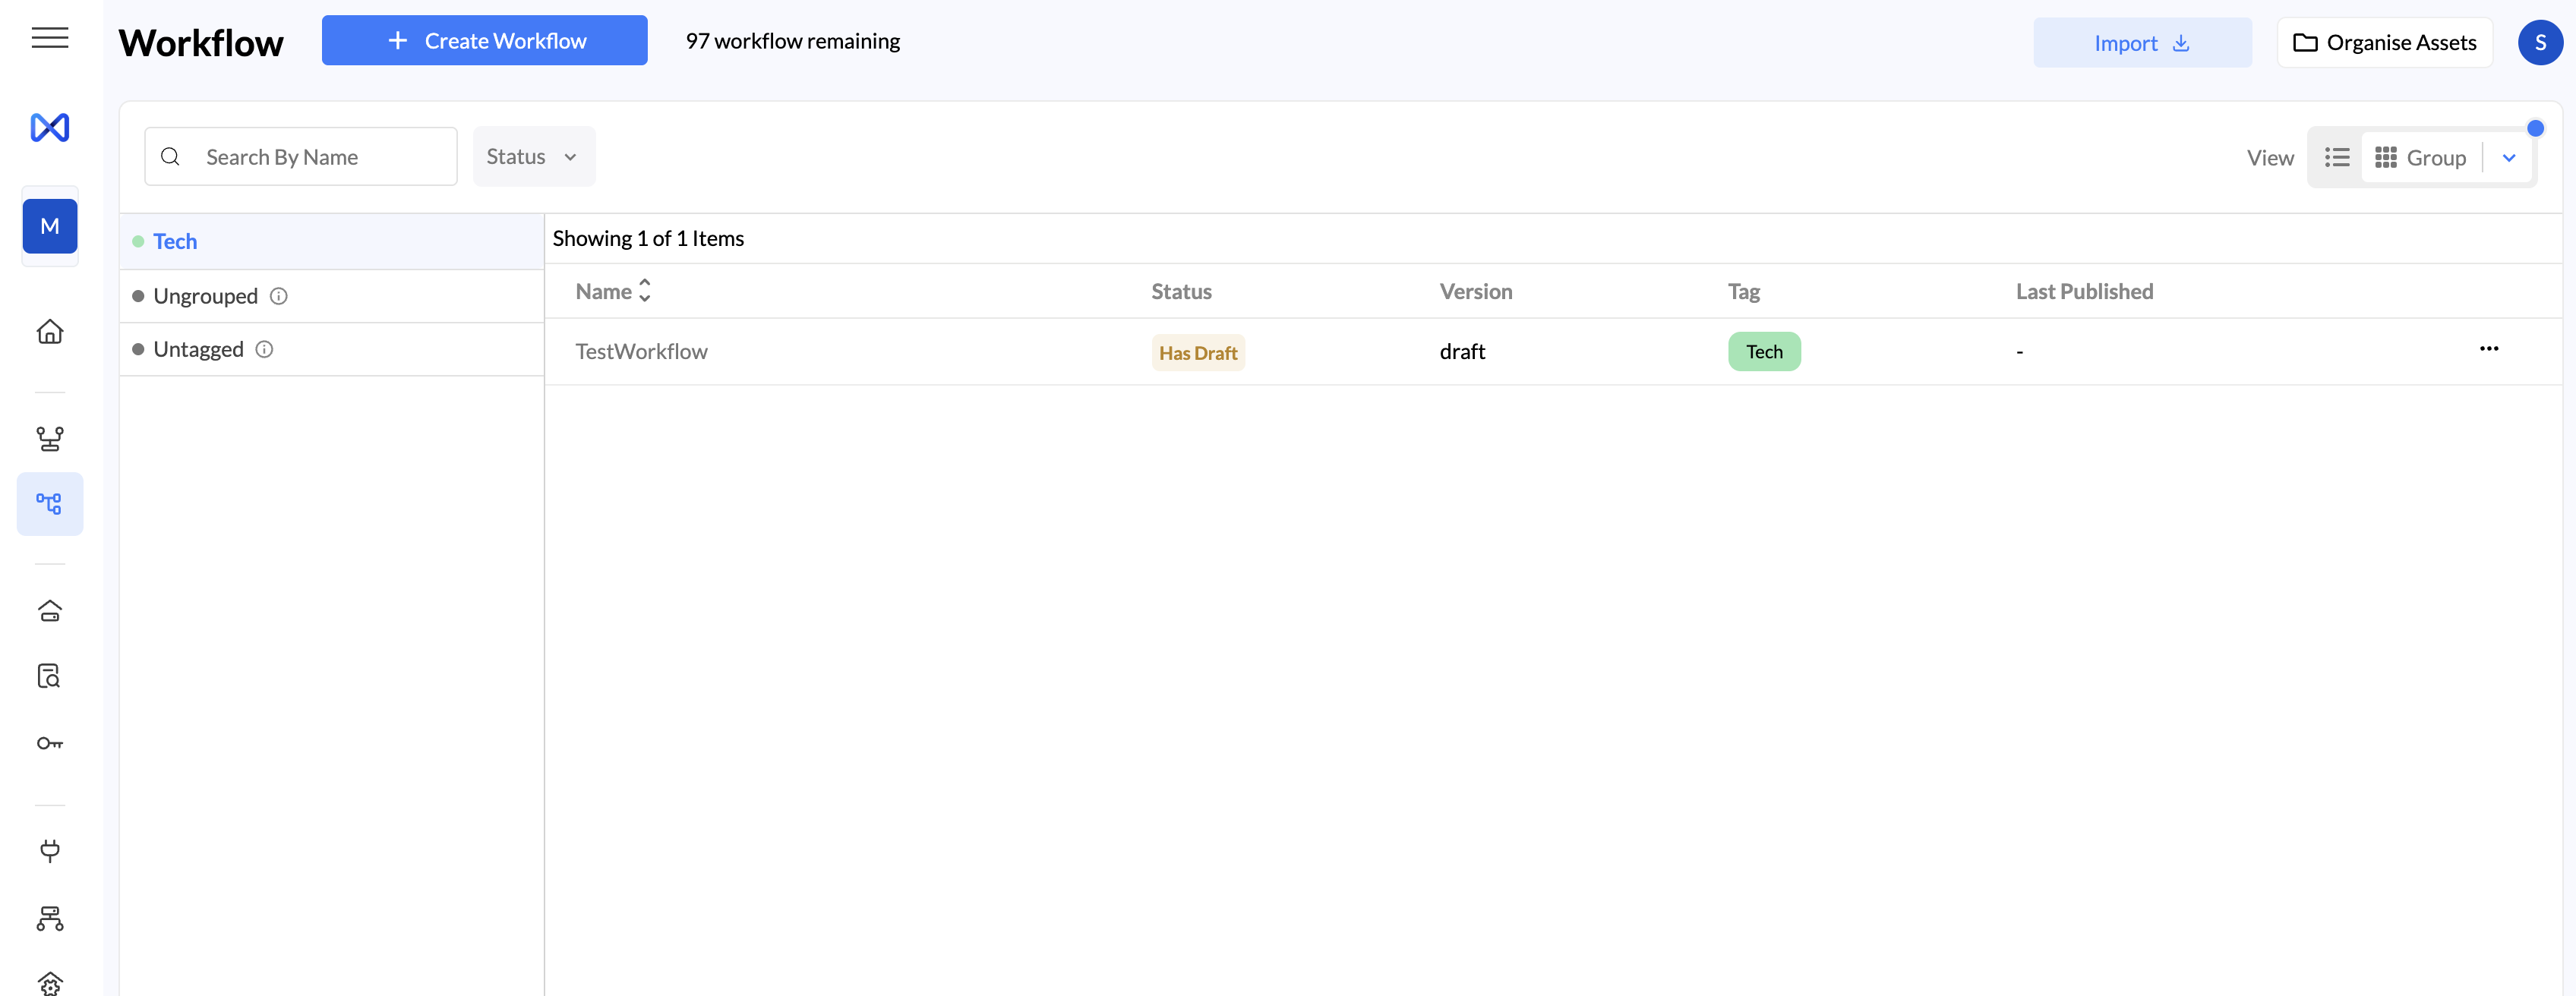
1. In the left navigation, open **Workflow**.
2. Click **Create Workflow**, or open an existing workflow.
3. Configure the **Trigger** node:
* In **Settings**, choose **API** (recommended for scheduled sync) or **Webhook** (for real-time sync).
* In **Input Params**, define any inputs your workflow needs (optional if the workflow can fetch everything itself).
4. Add nodes for fetch → transform → update (API/HTTP) → response.
5. Test in staging, then **Publish** to production when ready.
### Scheduled updates (Scheduler → Rule → Workflow)
Workflows cannot be scheduled directly. To run a sync workflow on a schedule, schedule a **rule** and have that rule call the **Workflow API endpoint**.
For full scheduler behavior and limitations, see [Scheduler documentation](/nected-docs/triggers-rule-workflow/scheduler.md).
#### Step-by-step: schedule a workflow sync
**A) Publish your workflow**
1. Open the workflow you want to schedule and ensure it’s **published**.
**B) Create a rule that directly triggers the workflow**
1. Open the **Rule Editor** and create a **Simple Rule**.
2. Add an **Action Node**.
3. In the Action type, select **Workflow**.
4. Pick the workflow where you were syncing the lookup table values from the dropdown list.
5. Map any input parameters if your workflow requires them.
6. Test the rule to confirm it triggers the workflow as expected.
**C) Schedule the rule using Scheduler**
1. Open the rule and go to the **Settings** panel (gear icon, if needed).
2. Scroll to **Schedule**.
3. Click **Create Schedule**.
4. Configure:
* Start/End window (optional)
* Frequency: Minutes / Hours / Daily / Weekly / Monthly / Cron
5. Create the schedule and publish the rule (schedules execute once the rule is published).
{% hint style="info" %}
#### Notes (important if you use Git-based sync)
From the Scheduler behavior:
* Schedules are **not synced via GitHub**, so they won’t appear in your Git repository.
* Schedules execute only in the **default workspace branch**.
{% endhint %}
### Use lookup values in rules and workflows
Attribute Library values can be referenced in:
* **Rules**: enforce allowed values when using lookup attributes in inputs/outputs.
* **Workflows**: reference lookup values in input params, **SetVariable**, and **Response** nodes.
More details: [Attribute Library reference](https://docs.nected.ai/nected-docs/references/attribute-library#connecting-attribute-library-with-other-entity).
### Troubleshooting
* **Workflow/rule runs but values don’t update**: check the API/HTTP node response. Confirm group + attribute identifiers and authentication headers.
* **Staging works but prod doesn’t**: ensure the workflow/rule is **Published** to production.
* **JSON format errors**: predefined values typically expect a simple array; transform nested data before updating.
* **Large lists time out**: reduce fetched fields and consider batching updates; use API bulk patterns for very large lists.
* **Can’t find your workflow**: clear tag filters in the Workflow list (`Tech`, `Ungrouped`, `Untagged`).
### Summary / best practices
* Use **UI** for small edits and quick corrections.
* Use the **API** for bulk updates and scripted migrations.
* Use **Workflows** for ongoing sync from external systems.
* Use **Scheduler (Rule → Workflow)** when you want the sync to run on a predictable cadence.